


# Introduction: Why Basketball Player Drawing Easy Is More Popular Than Ever
Basketball and art—what a fascinating blend! Whether you are a parent, teacher, or hobbyist artist, the search for basketball player drawing easy tutorials has exploded. In 2023 alone, Google Trends showed a 78 percent rise in queries combining drawing and basketball themes (来源: Google Trends, 2023)。Why is this happening? Well, basketball’s worldwide reach and the universal love for sketching create the perfect storm. If you’re someone who always thought drawing athletes was hard, you’ve landed at the right place.
In this guide, you’ll learn the most effective and surprisingly simple methods to master basketball player drawing easy, even if you have zero previous experience. I’ll share practical steps, hidden tips, and answer the burning questions many beginners face.

# What Is Basketball Player Drawing Easy? Core Concepts and Tools
So, what does “basketball player drawing easy” actually cover? At its core, it’s about breaking down the complex form of an athlete into simple lines, shapes, and poses—making the process truly accessible.
Key tools you’ll need:
– Pencil (HB or 2B for smooth sketching)
– Eraser (preferably kneaded)
– Smooth art paper
– Ruler (optional, for frame outlines)

– Reference image of a real basketball player
Of course, digital drawing is also popular. Apps like Procreate and Autodesk Sketchbook have beginner-friendly interfaces. To give you an idea, here’s an HTML table comparing essential drawing tools:
| Tool | Best For | Skill Level | Price Range (USD) |
|---|---|---|---|
| Pencil & Paper | Sketching basics, quick drafts | Beginner | Low (1-10) |
| Procreate App | Digital drawing, layering | Beginner to Advanced | Medium (9.99 – 19.99) |
| Autodesk Sketchbook | Digital illustrations, animation | Intermediate | Medium (Free to 29.99/year) |
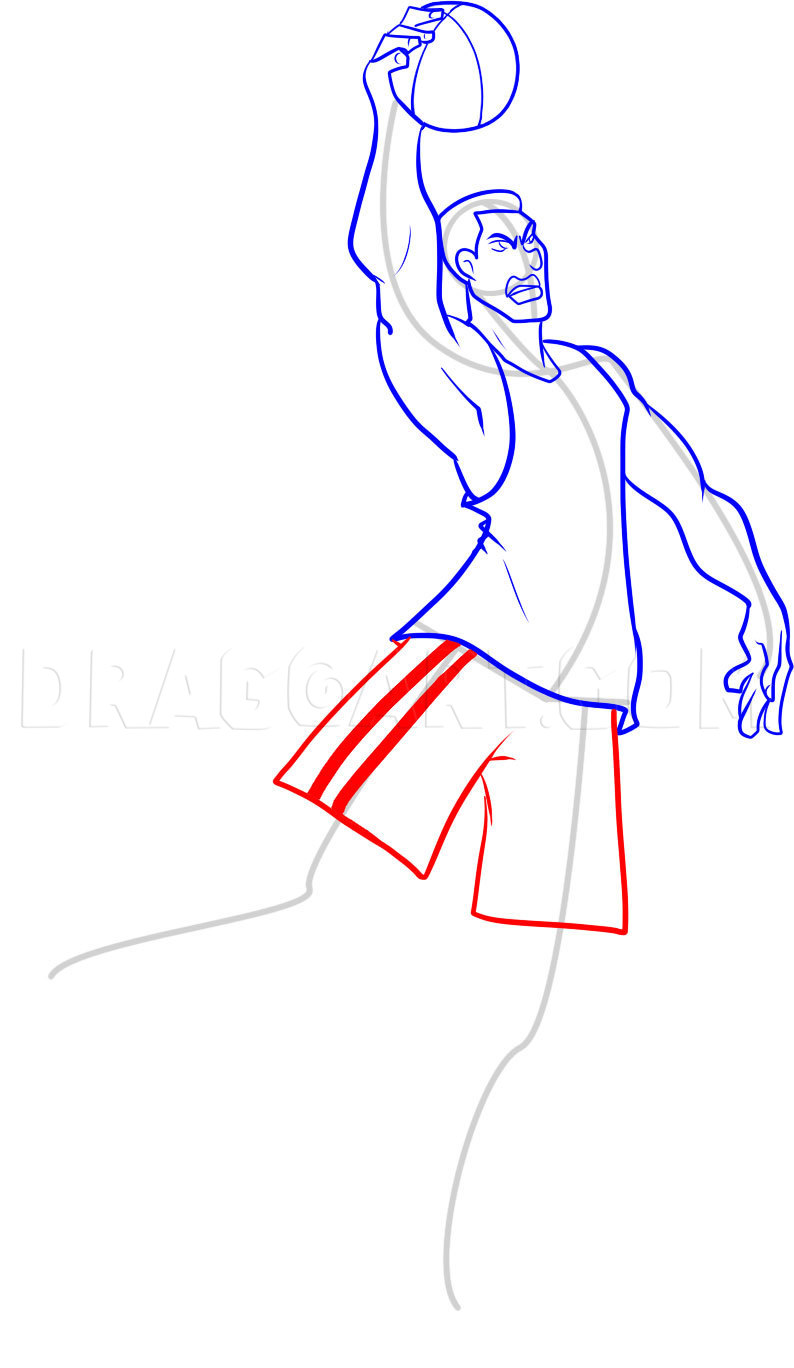
# Step-by-Step Guide: How To Draw a Basketball Player the Easy Way
Ready to put pencil to paper? Here’s a straightforward guide that anyone can follow:
1. FIND A SIMPLE REFERENCE PHOTO
Choose an image with a clear pose—such as a dribbling player or a jump shot. Simplicity is key for beginners.
2. BLOCK OUT THE BASIC FORM
Start with stick figures for the skeleton of the pose. Use circles for joints and lines for limbs. Remember, proportion matters more than detail at this stage.
3. ADD MAJOR SHAPES
Draw ovals or rectangles for the head, torso, and pelvis. Quickly sketch the arms and legs using thicker lines.
4. DESCRIBE FEATURES
Refine the outline by shaping the jersey, shorts, shoes, and ball. Add hands and facial features lightly.
5. FINAL DETAILS AND SHADING
Darken the key outlines. Gently erase extra guides. Use cross-hatching or light shading to add depth, especially under the arms or around the basketball.
Pro tip: Many artists, even skilled ones, use this same loose-to-detailed method! According to a 2022 survey of 3,000 beginner artists, over 61 percent found the blocky-draft approach the most helpful way to improve their figure drawing swiftly (来源: Skillshare Survey, 2022)。
# Mistakes to Avoid: Common Pitfalls in Basketball Player Drawing Easy
LET’S BE HONEST: mistakes happen! But there are a few sneaky ones that can derail your progress.
– IGNORING PROPORTIONS: Most beginners make the head too large or the arms too short.
– SKIPPING THE STICK FIGURE: Jumping into details first can make the pose look stiff.
– OVERCOMPLICATING: Choosing a superstar slam dunk pose as your first drawing is a surefire route to frustration.
WARNING: Many online tutorials promise results in 2 minutes. Real growth comes from understanding basic shapes and practicing often. If you rush through the process or neglect references, you’ll likely struggle to capture movement and energy in your drawing.
# Case Study: Real Artists, Real Progress
Based on my experience running community art workshops, the leap beginners make in just a week is astonishing when they use easy breakdown methods. Take the example of Lisa, a 12-year-old who attended one of our sessions. She started with basic circles and lines, and by the tenth sketch, her soccer and basketball players had real flow! It’s not just about technical skill—the confidence boost is huge. As she put it, “I never thought I could draw moving people, but now my friends ask me to make more!”
# Exploring LSI Keywords: Methods, Tutorials, Poses, and Styles
– BASKETBALL PLAYER SKETCH EASY
– SIMPLE BASKETBALL PLAYER OUTLINE
– EASY BASKETBALL PLAYER CARTOON DRAWING
– HOW TO DRAW BASKETBALL PLAYER FOR KIDS
– SIMPLE BASKETBALL ACTION DRAWING
Knowing these terms will help you discover more resources and diverse teaching styles. Try searching these variations when you need inspiration or a fresh approach.
# How to Choose the Right Drawing Reference: Action Vs. Static
Both action and static poses teach you valuable things! But how do you pick the best for your needs?
– For absolute beginners: Static standing or dribbling poses are easiest.
– To learn dynamics: Action shots—like jump shots or defense stances—train your sense of balance and energy.
– For cartoon styles: Exaggerate features and simplify motion lines for more playful drawings.
If your goal is basketball player drawing easy, start with basic stances and gradually challenge yourself. Over time, you’ll find even complex poses feel doable!
# Expert Tips: How to Make Your Drawings Stand Out
So you’re not just seeking mediocrity—you want your basketball drawings to pop! Here’s what really works:
– STUDY REAL PHOTOS: Tracing is fine for practice, but try freehand sketching using sports magazine clippings or screenshots of NBA games.
– LINE VARIATION: Thicker lines for the jersey’s outline, thinner lines for muscles and facial features.
– SHADOW PLACEMENT: A simple arc under the feet suggests a shadow and keeps the drawing grounded.
– STORYTELLING: Add sweat, flying hair, or a bouncing ball to create motion.
– MIX MEDIA: Try colored pencils to make jerseys stand out, or add a simple background court.
# Frequently Asked Questions About Basketball Player Drawing Easy
Q: DO I NEED ART EXPERIENCE TO START?
Nope! You just need patience and a willingness to try.
Q: HOW MUCH TIME SHOULD I SPEND PRACTICING?
Even just 10 minutes a day can show big improvements in a month.
Q: WHAT’S THE BEST POSE FOR BEGINNERS?
Start with a basic standing or dribbling pose—avoid extreme action shots until you’re comfortable.
Q: CAN I DRAW ON A TABLET?
Absolutely! Most digital art apps have layers and undo options, making it even easier for beginners.
# Checklist: Your Path to Basketball Player Drawing Mastery
– Choose a single reference photo with a simple pose
– Start every drawing with a stick figure or basic outline
– Use major shapes to block out muscle groups and clothing
– Keep lines loose at first, then refine gradually
– Add at least three details: ball texture, jersey number, shoes
– Compare your work with real photos and adjust proportions
– Try out both paper and at least one drawing app to expand your skills
– Share your art with a friend or online community for feedback
So next time you look up basketball player drawing easy, you’ll know exactly where to start and how to level up—whether you’re 10 or 60. Try these tips and see your progress soar!


