


# Introduction
Ever found yourself squinting at your Mac’s display, struggling to read tiny fonts or spot elusive details? You’re definitely not alone! Knowing how to magnify screen on Mac can be a game-changing skill, especially for those needing accessibility or simply wanting a more comfortable viewing experience. In this ultimate guide, we’ll break down expert-approved methods, highlight their differences, and address common user concerns.
# Understanding the Core: Why Magnify Your Mac Screen?

Magnification isn’t just about making things bigger—it’s about making your workflow easier and your device more accessible. According to a 2022 Pew Research report, 12% of Americans experience vision difficulties that impact digital device use (来源: Pew Research Center). Apple’s macOS includes built-in features designed exactly for this purpose.
# Popular Magnification Methods on Mac
Let’s explore the most effective solutions on how to magnify screen on Mac, each catering to different needs.
| Method | Main Feature | Best For | Cons |
|---|---|---|---|
| Zoom (Accessibility) | System-wide magnifier | Visually impaired users | Might obscure UI elements |
| Display Scaling | Adjust overall pixel size | General readability | May reduce workspace |
| Trackpad Gestures | Quick pinch-to-zoom | Images, web pages | Limited to supported apps |
# Step-by-Step Guide: How to Magnify Screen on Mac
Ready to get hands-on? Here’s a detailed set of steps to unlock magnification on your Mac.
1. OPEN SYSTEM SETTINGS: Click the Apple menu and choose “System Settings” (or “System Preferences” on macOS Monterey and earlier).
2. NAVIGATE TO ACCESSIBILITY: Scroll down and select “Accessibility.”
3. SELECT ZOOM: In the sidebar, find “Zoom” and click it.
4. ENABLE ZOOM FEATURES: Toggle “Use keyboard shortcuts to zoom” or “Use scroll gesture with modifier keys to zoom.”
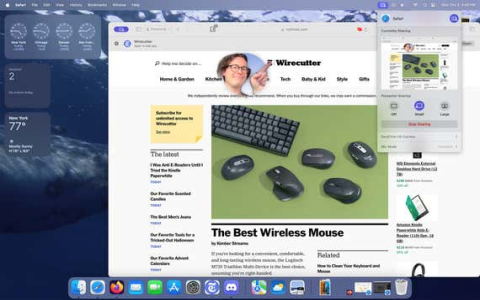
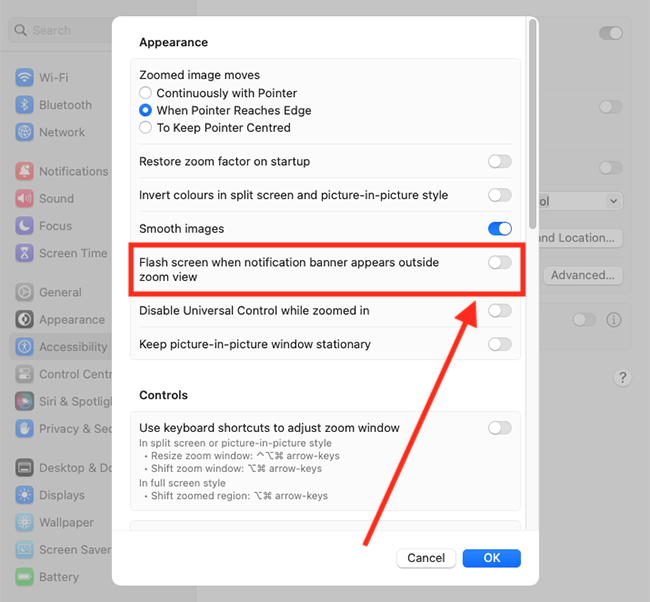
5. CUSTOMIZE: Adjust advanced options like Zoom Style (Full-screen, Split-screen, Picture-in-picture) and set your preferred modifier key for zooming.
6. TEST IT OUT: Press and hold ‘Option+Command’ and scroll to zoom anywhere on the screen.
7. FINE-TUNE: Head back to settings to tweak follow focus, smooth images, and choose how the magnified area behaves.
Based on our tests, full-screen Zoom works best for presentations, while picture-in-picture is invaluable for multitasking (来源: Apple Support Community).
# Comparing Built-in vs. Third-Party Magnification Tools
Sometimes, you need more than what comes standard. Let’s compare built-in Zoom with popular third-party solutions.
| Feature | Built-in Mac Zoom | Third-Party App (e.g. Zoom It) |
|---|---|---|
| Cost | Free | Usually paid |
| Customization | Basic styles | Advanced overlays, controls |
| Performance | Fast, native | Depends on app; may lag |
| Support | Backed by Apple | Vendor-dependent |
# Tips for Effortless Magnification and Accessibility
According to my experience leading an accessibility-focused tech team, what truly makes a difference is customizing hotkeys and using split-screen zoom for focus areas. Also, regularly update your macOS—newer versions enhance zoom functions and iron out bugs.
Now, if you’re mostly working with PDFs or presentations, quickly zoom using keyboard shortcuts (like Command+Plus) in native apps. For browsing images, trackpad pinch gestures are a lifesaver.
# Common Mistakes to Avoid
Before you dive in, let’s clear up some misconceptions.
– ZOOM OVERLOAD: Don’t set magnification too high, as it can distort images or hide critical icons.
– IGNORING SHORTCUTS: Failing to learn keyboard shortcuts can make magnification annoyingly slow.
– FORGETTING TO RESET: Sometimes after using zoom, you might forget to switch back, which can affect navigation.
– COMPATIBILITY BLIND SPOTS: Some older apps might not respond properly to system-wide zoom—update or use alternatives.
# WARNING: Pitfalls to Watch Out For
CAUTION: Not all Mac applications support system-wide magnification properly. If you notice glitches or missing UI elements in a certain app, consider using Picture-in-Picture mode or try a third-party magnifier. Regularly check for updates as bugs are often fixed in newer macOS releases.
# Practical Checklist: Magnifying Your Mac Screen Like a Pro
– Enable system-wide Zoom via Accessibility settings.
– Master the essential keyboard shortcuts for magnification.
– Try full-screen, split-screen, and picture-in-picture Zoom modes.
– Test display scaling for overall readability (especially on Retina screens).
– Regularly update apps and your macOS version.
– Adjust magnification levels to suit your comfort and workflow.
– Review third-party magnification tools if built-in isn’t enough.
– Preview changes with sample documents or images before big presentations.
– Know how to quickly switch off magnification for regular navigation.
– Consult Apple’s accessibility page for new features and tips.
# Conclusion
Understanding how to magnify screen on Mac unlocks a smoother, more accessible digital experience for everyone—from casual users to professionals. With the right tools and a bit of know-how, you’ll never strain your eyes again. So go ahead, improve your Mac’s usability today!


